Imprivata Locker Logs
To send logs to Imprivata Support from the Imprivata Locker app:
From an error screen:
- Tap Diagnostics. The Diagnostics screen opens.
- Tap Upload log files to send logs to Imprivata support.
- Enter the case number and tap Upload log files.
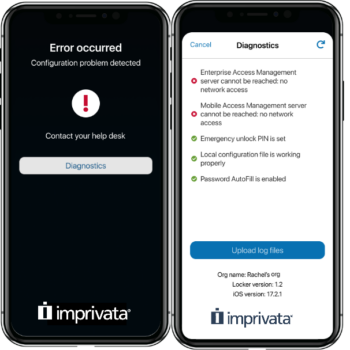
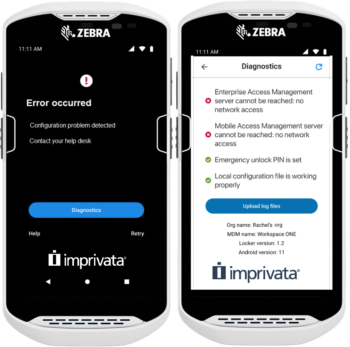
Imprivata Locker presents details about any failures it encountered when attempting to access resources that should be available. These include a number of local and network resources:
-
- Communication with Mobile Access Management Server — the MAM server cannot be reached due to network access, server errors, or response timeouts.
- Communication with the Enterprise Access Management Server — the Imprivata Enterprise Access Management (formerly OneSign) server cannot be reached due to network access, server errors, or response timeouts.
- Local configuration file — the local configuration file may be missing or is corrupt.
- Password AutoFill is enabled — indicates whether Password AutoFill is enabled for the Locker app in iOS settings.
- Emergency Unlock PIN — indicates whether Emergency Unlock PIN is set in the MDM.
- Push notifications test — displays the success or failure of a test push notification from the Locker app. Possible statuses are:
- Push notifications test successful — indicates the test was successful
- Test Push Received but delayed — indicates the test took longer than 5 seconds to be received
- Test push not received in 10 seconds — indicates the test took longer than the 10 second timeout
- Push Notifications are disabled —Locker detects that notifications are not allowed for the app
From the white device checkout screens:
- Tap the information icon next to the Imprivata log. The Diagnostics screen opens.
- Tap Upload log files.
- Enter the case number and tap Upload to send logs to Imprivata support.
From the blue lock screen:
- Tap the information icon next to the Imprivata logo. The Diagnostics screen opens.
- Tap Upload log files to send logs to Imprivata support.
- Enter the case number and tap Upload log files.
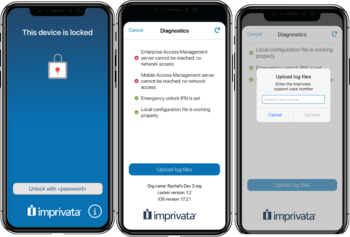
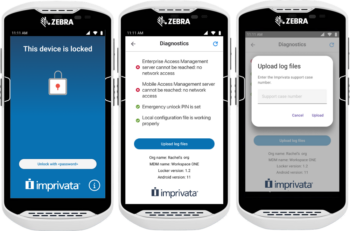
Logs will be sent automatically to Imprivata support.
Launchpad Logs
1. On the console, Navigate to Launchpads tab and click the Launchpad name to view its details
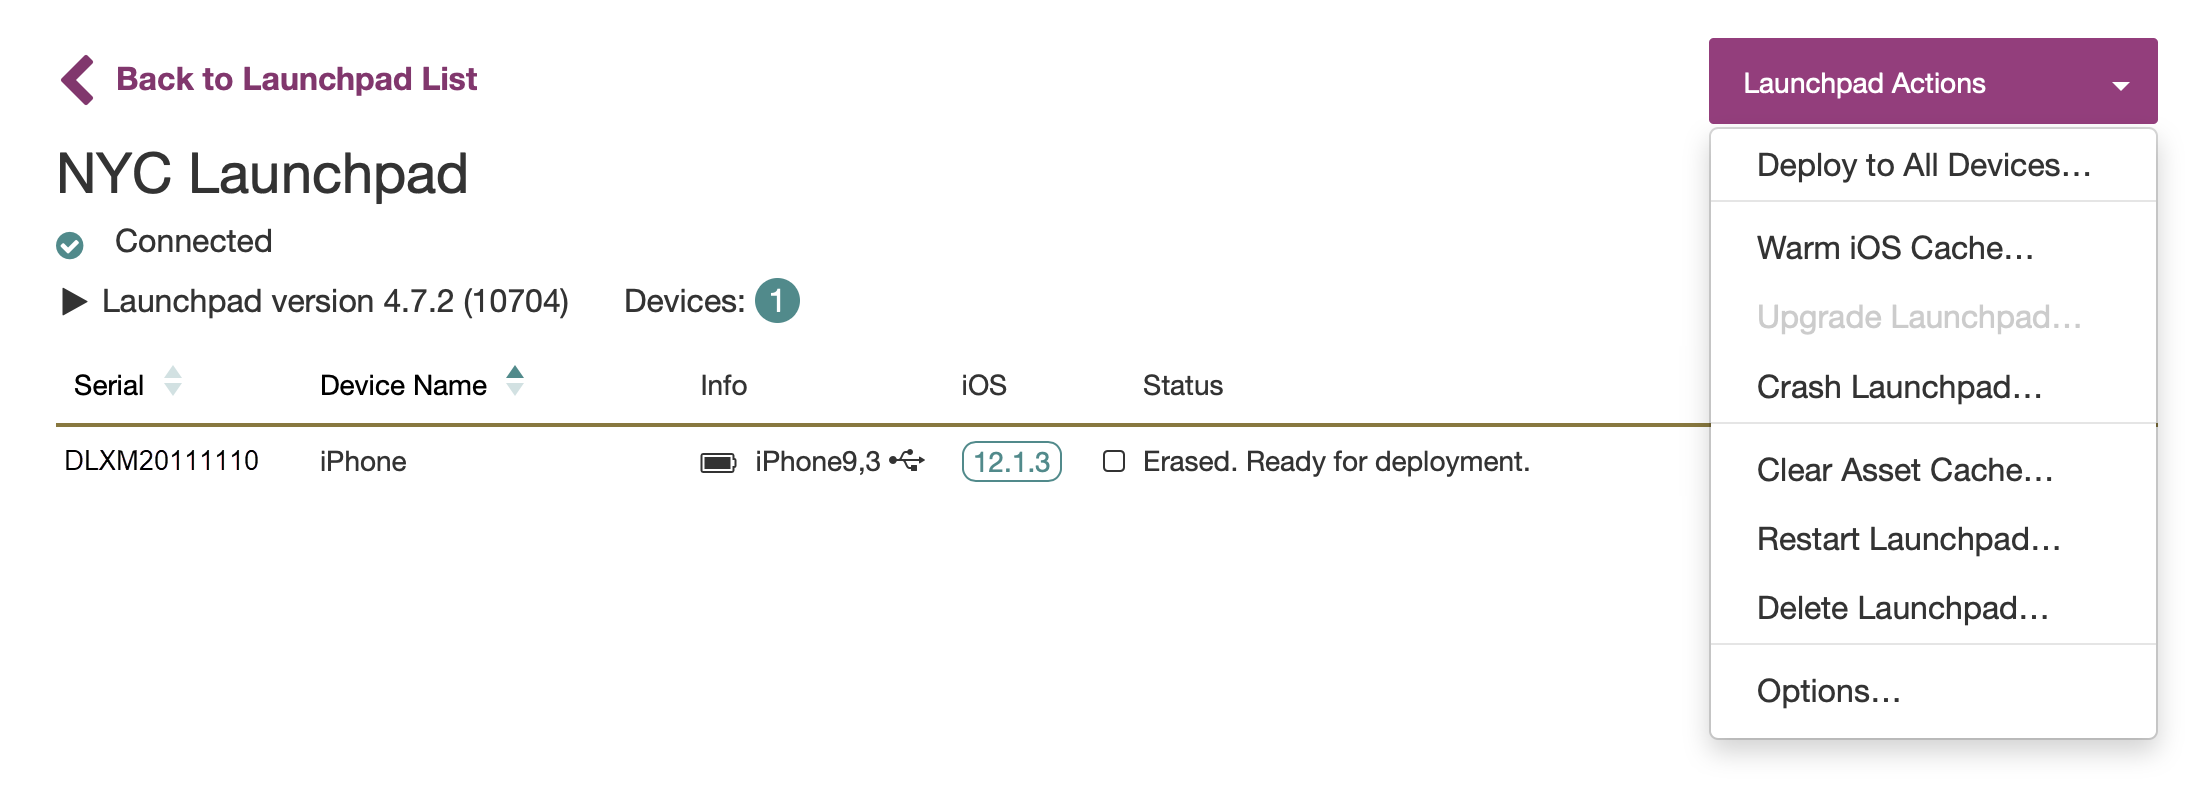
2. Under Launchpad Actions menu, click Options…:
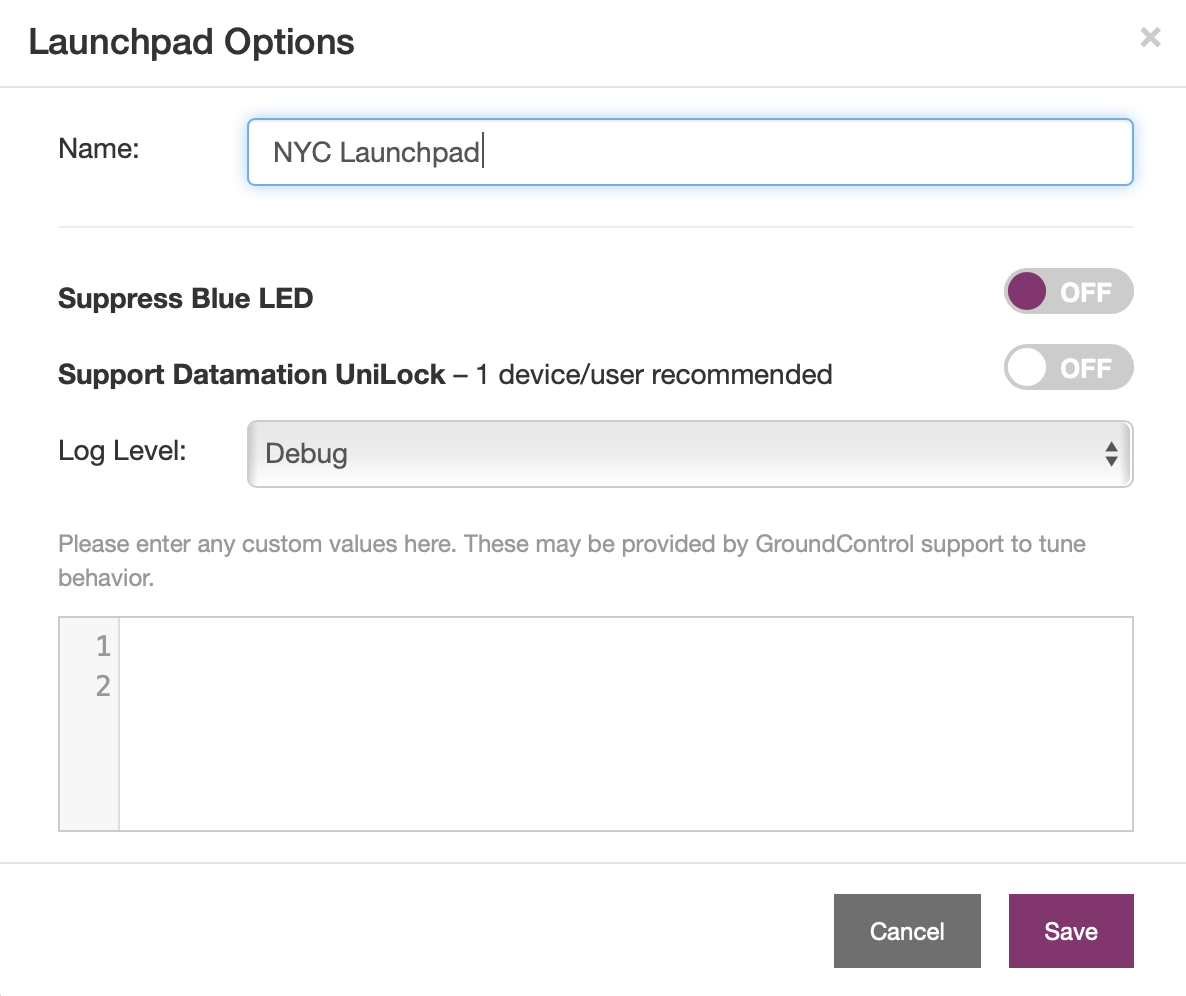
 3. From the dropdown list, select Debug as the log level. Click Save to restart the Launchpad. No need to enter any custom values here.
4. Proceed with a workflow or other action that you need to troubleshoot. Make sure to carefully follow the same steps to reproduce the issue. The log files are automatically stored on your machine.
When you are done:
- Submit a support ticket with detailed steps to reproduce the issue.
- Indicate the date and time the issue occurred.
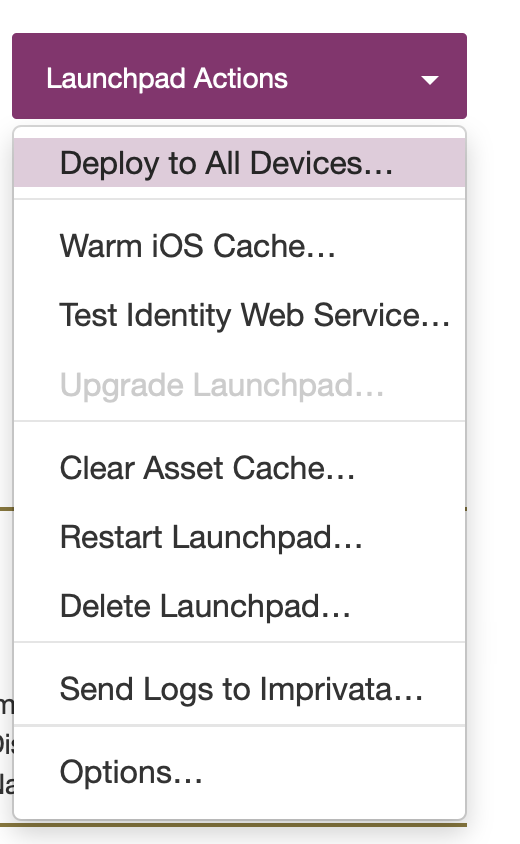
- After you create the ticket, send Launchpad Logs via Launchpad Actions > Send Logs to Imprivata…
Logs can also be accessed via the Launchpad Menu > Help> Open Log Folder.

